CSS Selectors 101: Targeting Elements with Precision
You know that moment when you're trying to style a specific button on your webpage, but somehow every button changes color? Yeah, I've been there. Multiple times.
That's when I realized I needed to actually understand CSS selectors properly. Not just copy-paste from Stack Overflow, but really get how they work.
Let me share what I learned.
Why Do We Even Need CSS Selectors?
Here's the thing: HTML gives you the structure, but CSS makes it look good. But how does CSS know which elements to style?
That's where selectors come in.
Think of it like addressing a letter. You can't just write "Hey you!" on an envelope and expect it to reach the right person. You need an address, a name, something specific.
CSS selectors are exactly that—they're the addressing system for your HTML elements.
When I first started, I thought all I needed was:
p {
  color: blue;
}
And sure, this works. But what if I only want some paragraphs to be blue? What if I have 50 paragraphs and only want to style 3 of them?
That's when things get interesting.
The Element Selector: Keep It Simple
The most basic selector is the element selector. It targets all elements of a specific type.
h1 {
  color: navy;
}

p {
  font-size: 16px;
}

button {
  background-color: green;
}
This is super straightforward. Every <h1> on your page gets navy color. Every <p> gets 16px font size. Every <button>gets a green background.
When I use this:
When I want consistent styling across all elements of the same type. Like making all headings the same color or all paragraphs the same font size.
The catch:
It's too broad. If you have 10 buttons and only want to style 1 of them differently, this won't help.
The Class Selector: Your Best Friend
This is where things clicked for me. Classes let you group elements together, even if they're different types.
<h2 class="highlight">Important Heading</h2>
<p class="highlight">Important paragraph</p>
<button class="highlight">Important Button</button>
.highlight {
  background-color: yellow;
  font-weight: bold;
}
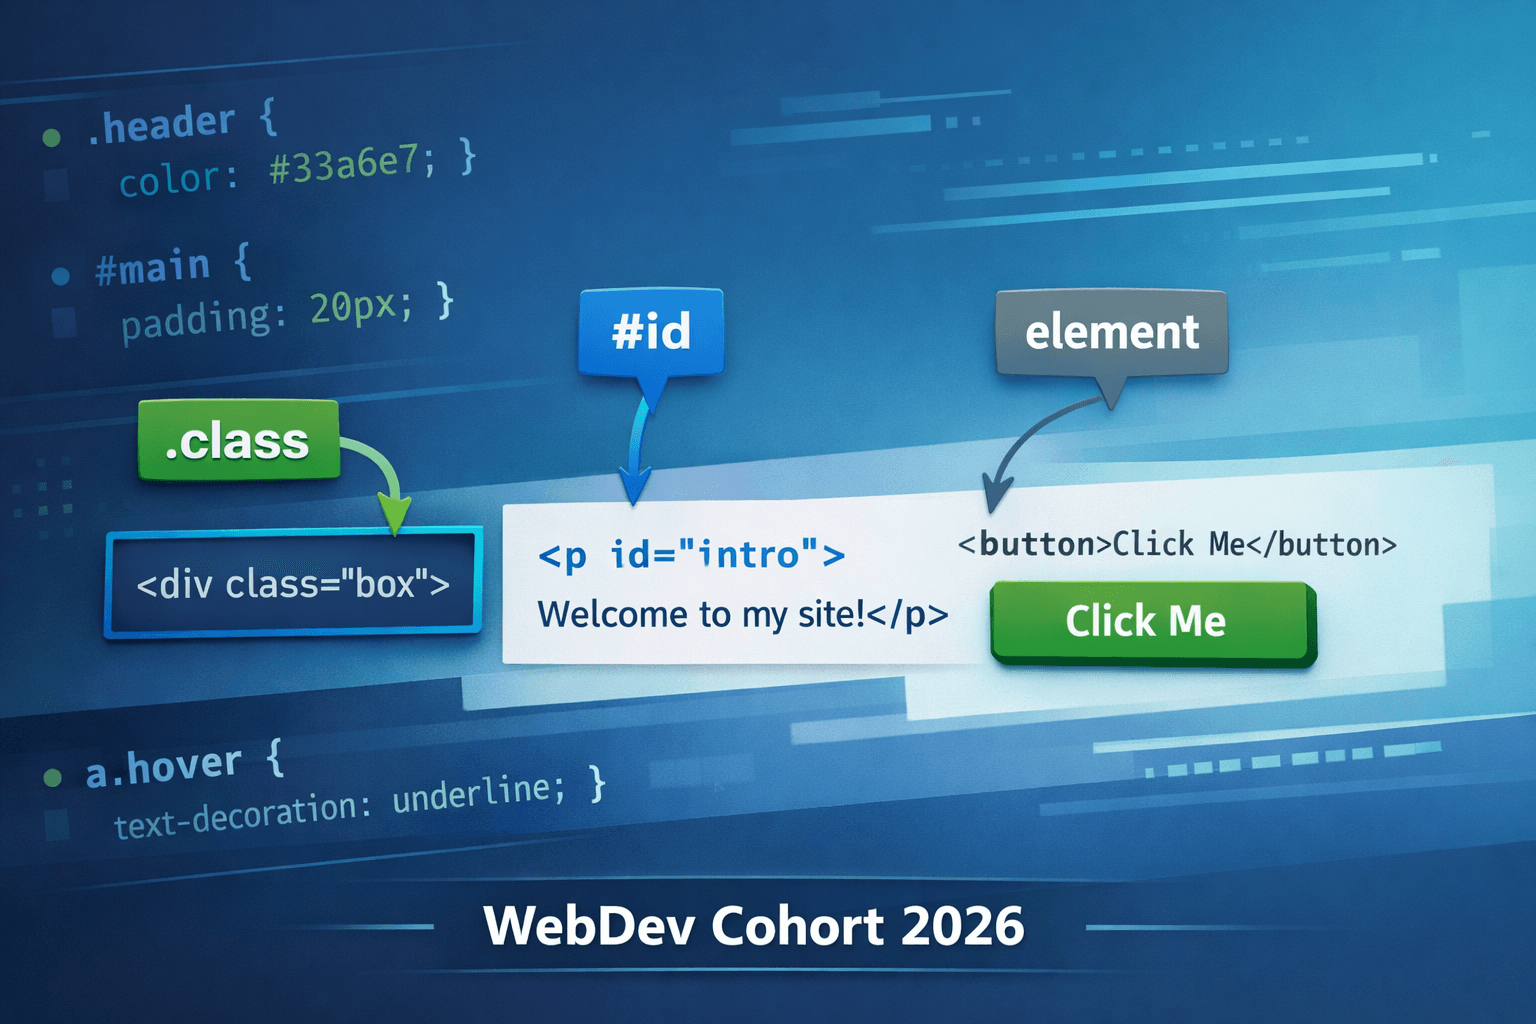
See that dot (.) before highlight? That's how you target a class in CSS.
Now, all three elements—heading, paragraph, and button—get the same styling because they share the class highlight.
Why I love this:
You can reuse classes anywhere. Need 5 different elements to have the same style? Give them all the same class. Done.
Real example from my project:
I was building a card layout and needed all cards to look the same. Instead of styling each card individually, I just gave them all a .card class:
.card {
  border: 1px solid #ddd;
  padding: 20px;
  border-radius: 8px;
  box-shadow: 0 2px 4px rgba(0,0,0,0.1);
}
Saved me so much time.
The ID Selector: Use Sparingly
IDs are like classes, but with one major difference: an ID should be unique on the page.
<div id="header">Site Header</div>
<div id="main-content">Main content here</div>
<div id="footer">Footer</div>
#header {
  background-color: darkblue;
  color: white;
}

#main-content {
  padding: 40px;
}

#footer {
  text-align: center;
  font-size: 14px;
}
Notice the hash symbol (#) before the ID name? That's the syntax.
When I use IDs:
Honestly? Not that often for styling. IDs are great for JavaScript or linking to specific sections (like <a href="#main-content">), but for CSS, classes are usually better.
Here's why:
IDs have higher specificity (we'll get to that), and they're harder to reuse. If you give something an ID, you're saying "this is the only one on the page." That's rarely what you want for styling.
My rule of thumb:
Classes for styling, IDs for unique page sections or JavaScript hooks.
Group Selectors: DRY (Don't Repeat Yourself)
This was a game-changer when I discovered it.
Let's say you want multiple elements to share the same styles:
h1 {
  color: navy;
  font-family: Arial, sans-serif;
}

h2 {
  color: navy;
  font-family: Arial, sans-serif;
}

h3 {
  color: navy;
  font-family: Arial, sans-serif;
}
That's... repetitive. And boring. And hard to maintain.
Here's the better way:
h1, h2, h3 {
  color: navy;
  font-family: Arial, sans-serif;
}
Just separate the selectors with commas. Now all three headings get the same styles.
You can mix and match too:
h1, .special-text, #intro {
  text-transform: uppercase;
}
This applies uppercase styling to all <h1> elements, anything with the class special-text, and the element with ID intro.
When I use this:
Whenever I notice I'm writing the same CSS rules multiple times. It keeps my code clean and makes updates easier.
Descendant Selectors: Getting Specific
Okay, this is where it gets really powerful.
Sometimes you want to style an element, but only when it's inside another element.
<div class="card">
  <p>This paragraph is inside the card.</p>
</div>

<p>This paragraph is outside the card.</p>
.card p {
  color: blue;
}
This targets only the <p> that's inside .card. The paragraph outside? Unaffected.
The syntax:
Just put a space between the selectors. .card p means "a <p> that's a descendant of .card."
Real-world example:
I had a navigation menu where I wanted links to look different:
<nav class="main-nav">
  <a href="#">Home</a>
  <a href="#">About</a>
  <a href="#">Contact</a>
</nav>

<a href="#">Regular link outside nav</a>
.main-nav a {
  color: white;
  text-decoration: none;
  padding: 10px;
}
Now only the links inside .main-nav get styled. The link outside? It stays as a default browser link.
Important note:
Descendant selectors work for any level of nesting. If you have:
<div class="card">
  <div class="content">
    <p>Text here</p>
  </div>
</div>
The selector .card p will still work, even though the <p> is nested two levels deep.
Selector Priority: Who Wins?
Here's something that confused me for ages: What happens when multiple selectors target the same element?
<p class="intro" id="first-paragraph">Hello!</p>
p {
  color: black;
}

.intro {
  color: blue;
}

#first-paragraph {
  color: red;
}
Which color wins?
The answer: red.
CSS has a specificity system. Think of it as a scoring system:
Element selectors: 1 point
Class selectors: 10 points
ID selectors: 100 points
So in our example:
phas 1 point.introhas 10 points#first-paragraphhas 100 points
The highest score wins. That's why the ID selector wins here.
What I learned the hard way:
Don't fight specificity with !important. I used to do this:
.intro {
  color: blue !important;
}
This forces the rule to apply no matter what. But it creates chaos later when you need to override that rule.
Better approach:
Use more specific selectors instead:
div.intro {
  color: blue;
}
This has more specificity than just .intro, and it's cleaner than using !important.
Before & After: Seeing the Difference
Let me show you a real example of selectors in action.
Before (no selectors, default styling):
<h1>My Website</h1>
<p>Welcome to my site.</p>
<p>Here's some content.</p>
<button>Click Me</button>
<button>Another Button</button>
Everything looks bland. Default black text, Times New Roman font, unstyled buttons.
After (with selectors):
<h1 class="page-title">My Website</h1>
<p class="intro">Welcome to my site.</p>
<p>Here's some content.</p>
<button class="primary-btn">Click Me</button>
<button>Another Button</button>
.page-title {
  color: darkblue;
  font-family: Arial, sans-serif;
  font-size: 36px;
}

.intro {
  font-size: 18px;
  font-weight: bold;
  color: #333;
}

.primary-btn {
  background-color: blue;
  color: white;
  padding: 10px 20px;
  border: none;
  border-radius: 5px;
  cursor: pointer;
}
Now:
The heading stands out with color and size
The intro paragraph is emphasized
The primary button looks professional
The regular paragraph and second button keep default styles
This is the power of selectors. You target exactly what you want, nothing more, nothing less.
Key Takeaways (What I Wish I Knew Earlier)
Start with element selectors for global styles
Use them for things that should be consistent everywhere (like body font, heading sizes).Classes are your workhorses
Use them for most styling. They're reusable and flexible.IDs are for unique elements
Great for page sections or JavaScript, but don't rely on them for styling.Group selectors save time
Stop repeating yourself. Group common styles together.Descendant selectors give you control
Want to style something only in a specific context? This is how.Specificity matters
More specific selectors win. Plan your selector strategy accordingly.
Final Thoughts
CSS selectors seemed complicated at first, but now I see them as one of the most elegant parts of web development.
They're precise. They're powerful. They're the bridge between your HTML structure and your visual design.
And once you understand them, styling becomes less about fighting with CSS and more about crafting exactly the look you want.
If you're just starting out, take your time with this. Practice with small projects. Build a simple webpage and experiment with different selectors.
Trust me, it's worth it.
Have you struggled with CSS selectors before? What clicked for you? I'd love to hear your "aha!" moment.
Written by Saurabh Prajapati
Full-stack Software Engineer specializing in GenAI, React, and Modern Web Technologies.
Currently building enterprise solutions at IBM India Software Lab.


